Gold Monkey Idol
Having had a lot of interest pertaining to the steps necessary to create a project like this one, I’ve decided to delve into a simplified tutorial utilizing photos taken along the journey.
Lets start from the beginning of this project. First came my scale sketches, It always helps to have good drawings to assist in bending your armature wire and to measure against all the way through the sculpting process .
Also, a collection of quality tools and calipers is worth its weight in clay.
Packing out the Armature
It’s very important to plan out the entire process prior to moving forward with your sculpture. From the start, I had every intention of creating the molds for these pieces in a platinum silicone.
Knowing that platinum silicone is reactive with any materials containing sulfur, I chose my materials very carefully to ensure that none of them contained the compound.
I used “Monster Clay ” on this project because it is sulfur- free and will not dry out or crack, thus allowing me to come back to this project days, weeks or months later. It is however, a bit of a learning curve to understand the rather unique qualities of this wax- based clay.
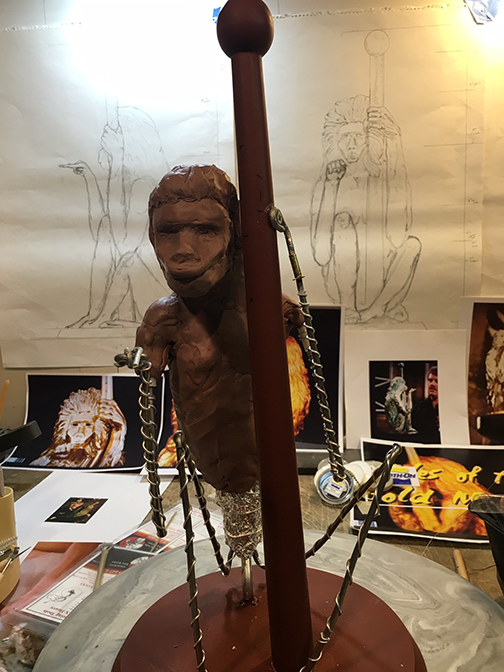

a Hairy situation
I had the luxury of taking my time to sculpt this piece. I endeavored to place every detail as close as possible to the original prop.
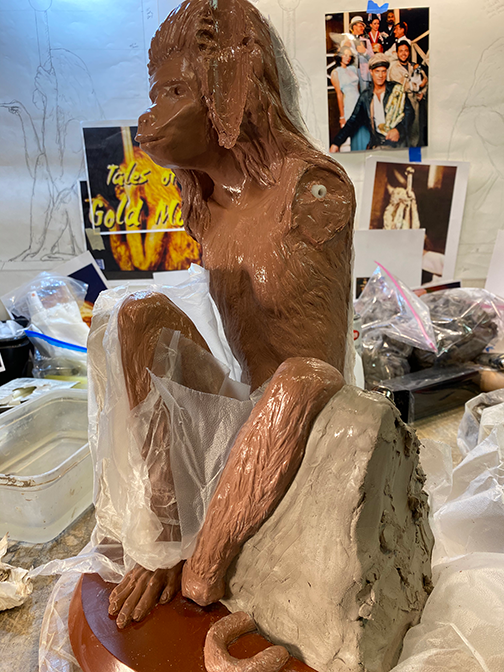
To the left, you can see the body as I begin packing out the clay for the fur/hair on the monkey’s back.
A good lazy susan is invaluable when working around a piece like this . It helps me to not get hung up on any one area.
To make a point
Honestly, until now, I had never before sculpted a pointing primate. This judgmental simian with all of his negative space was pretty challenging, but wildly satisfying to complete. To the right, is my nearly completed clay prototype.
While creating the armature, I chose to produce the base and pole from wood primed with a sulfur free sealer in order to give me the ability to stabilize and handle the bulky heavy sculpture.

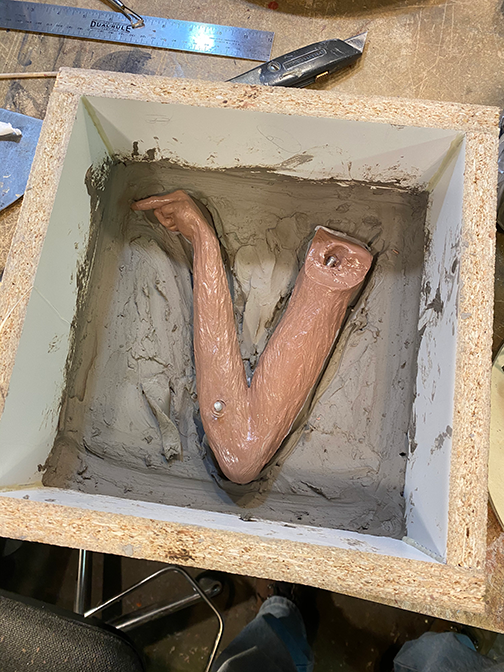
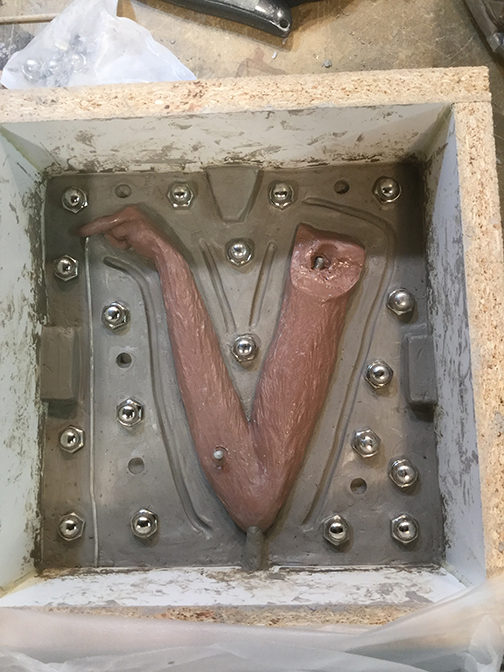
an arm and a plan
Creating the mold box is one of the most tedious aspects of a project like this . I designed the monkey to be molded in three parts. Looking back, it probably should have been more. Here, I have embedded the right arm in a sulfur free water based WED clay. This is a very important step in order to create a nicely fitting, clean, two-part mold.
Having created a nice parting line and smoothing all of the WED clay, I then placed all of the keys, pour spout and a wire to act as a way for air to escape from the fingertip of the mold.
The next step is a few light coats of Krylon Clear Gloss spray paint to act as a sealer on the clay. Once dry, some mold release is applied to the mold and sides of the melamine box .

first side poured
With part A and B carefully measured and mixed, The Mold Star Platinum Silicone is poured into the first side of the mold and allowed to cure.
A Clean start
After an overnight cure, I de-molded the arm and went to work. Very carefully, I cleaned and re-seated the prototype limb into the now completed first side of the two part mold. Once prepared and reset into the melamine mold box, a hot glue gun was used to seal the edges of the mold and mold box sides to prevent the silicone from leaking .
Mold release is applied and allowed to dry before carefully measuring and mixing the silicone for the second side. Once poured, the mold is set aside to cure.
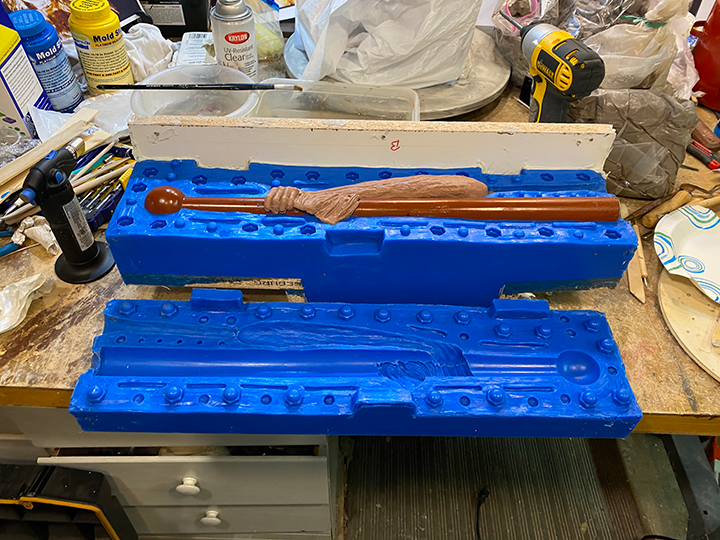
The finished mold is shown to the right .
Left holding the stick
The left arm and pole are molded next.
Following the same process, the mold is set up in clay and molded in silicone. It is then cleaned, reset, and poured .
The results are visible here.
Molding is just as much an art as it is science and takes an abundance of patience.
I needed every ounce of that patience to pull me through the next step of the process, the main body.

Monkey in a box
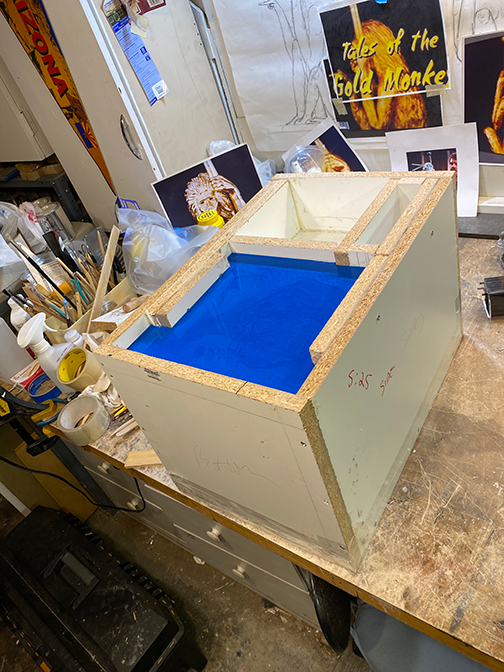
Creating the mold and box for the clay body and base turned out to be the most challenging aspect of the process. Inside of the legs, the negative space needed to be filled. I attempted to envision exactly how I wanted the two part mold to separate. I began packing out the WED clay. Once smoothed out, all of the keys are placed and the sealer and release agent are then applied. The first side is boxed and now ready for silicone .
Preparing the second side
After careful calculations, the silicone is measured, poured and cured. The next morning, the mold box is disassembled and the WED clay is removed. Hours of excruciating cleaning and reassembly of the box lead to the final steps of the main body mold.
Following all the same steps as the other molds, this one is ready to be sealed with hot glue to prevent leaks. Next, the release agent is applied.
An important note about silicone: it will not stick to anything but itself. That’s what makes the application of release agents vital to the success of your molds ability to separate.
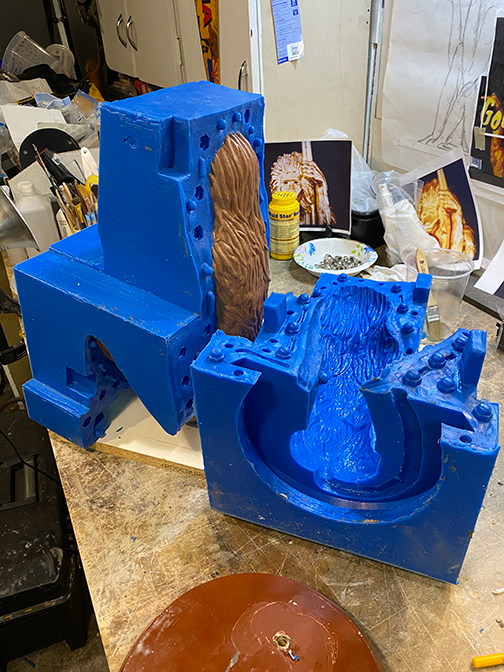
Completed Mold
With the second half of the main body mold complete, it is now ready to be cleaned and dried.
Next Post.. Pouring the Smooth Cast Resins…


